Saturday, December 12, 2015
Holiday QR Codes
Posted by
jackbennysmom
at
4:16 PM
QR codes can help students become self-directed learners. I added QR codes to an existing "Read the Room" counting activity, because I wanted to integrate technology and iPad use into math somehow. I was able to find a similar counting activity with teen number QR codes, so I just used the pre-made codes for this. I taped the code on my already-made holiday number cards, then I taped them around the room for my little detectives to find. This was a station, so each table took a turn on a different day of the week.
First, students took a clipboard and recording sheet around the room, to find where I had taped numbers on the wall. They had to count the dots in the ten frames (teen numbers) and record their answer. When all the numbers were done, they could get an iPad and use the QR code reader to scan the code to check their answer. They had a lot of fun, and I'm proud of how independent they were.
This video shows how students were finishing a counting activity and practicing teen numbers, then could check the accuracy of their work independently, by scanning a code. It was great for self assessment, because if they had reversals (41 instead of 14), or if they miscounted, then they could erase and fix their answer. It was wonderful to watch them walk around the room and stay engaged.
I hope I can find more fun activities like this in the future, or else make my own!
Monday, December 7, 2015
Dear Santa Doodle PicCollage
Posted by
jackbennysmom
at
10:26 PM
Today my students and I tried some more app smashing! I always have the students brainstorm what they want for Christmas, and we write a quick little letter to Santa. Instead of doing the work on paper this year, my colleague suggested I try the iPad. Genius! Here's how we did it!
(Half the class had an iPad, the other half was working on another literacy activity)
1. Draw a picture of what they want, using Doodle Buddy. Save to camera roll.
2. Open Pic Collage and import their picture.
3. Choose some holiday or festive "wrapping paper" from the background choices.
4. Add text, using sight words and phonetic spelling, "Can I have ________?"
5 I typed "Dear Santa" for each student, and they typed "Love," and their name.
6. Students could change fonts and move the text around until they liked how it looked.
7. Save to camera roll.
I later uploaded all the work to Google Drive, then opened them on my desktop computer and sent them to the color printer to hang up for parents and others to see. I will also share them via email to parents.
Some of their phonetic spelling is awesome! Sometimes the iPad used auto-correct, and then their sentences were kind of weird. So next time, I would turn off auto-correct if possible! I plan to write the "adult spelling" on their papers that are hanging in the hall. About 60% asked for Xbox. Hmmmm... go figure.
Another suggestion would be to get PicCollage open ahead of time, and type the "Dear Santa" and set up the template, so they just have to open the app and add their own sentence with the picture. Either way, I had to touch each iPad to finish the text and then help them save, before uploading to Drive.
Now I can email their letters to Santa! How slick is that!?! Happy Holidays!
UPDATE 12/17: Now that students use Seesaw, we added voice to each project, too! Students uploaded the PicCollage item into Seesaw and pressed the record button to read their message to Santa. With Seesaw, you can print their project with a QR code that can be scanned to access their recording. I skipped the Google Drive step listed above because Seesaw makes it so easy to print. It's a great way to share with families.
Saturday, November 21, 2015
Smash with Little Bird Tales
Posted by
jackbennysmom
at
8:53 PM
I have decided to document my technology activities this year. At least when I remember!
I would like to share with you my students' tech project from our study of animals. Here's how we made it:
1. Students drew an animal on the ipad, using the app "Doodle Buddy". We did this during my two lab times, 6-7 students at a time, using my ipads and some from the teacher next door.
1. Students drew an animal on the ipad, using the app "Doodle Buddy". We did this during my two lab times, 6-7 students at a time, using my ipads and some from the teacher next door.
2. They copied sight words to make a sentence, "I see a ____.", and phonetically spelled their animal word. They could use a stylus for writing if they chose.
3. I saved the drawing as a photo, and loaded it to my Google Drive.
4. I downloaded the photos from Google to my desktop computer, and then uploaded them onto the site "littlebirdtales.com". (some drawings cut off the top edge when uploaded - bummer, but I'll know for next time!)
5. Students worked with me individually (during rest time or playtime) to record their voice on their page, using the built-in mic on a chromebook.
6. Finally, I shared the e-book with parents.
Enjoy our little animal tale!!! The students really had fun making this, and hearing themselves and classmates narrate our story.
Friday, October 30, 2015
We Are Brave!
Posted by
jackbennysmom
at
11:45 PM
For Halloween, I wanted to incorporate some technology. Here's a fun story we told in our class!
Students brainstormed things they are "not" afraid of, and then their photo was taken in front of the green screen, showing their bravest, toughest face. The photos turned out great, and I have assembled them all into this little video for you. I also decided to print the photos to make a class book for the students to read in the room. Enjoy!
This took some prep ahead of time - after students brainstormed, I used my prep time to look for online images of their items (Frankenstein, witch, clown, etc) - no blood and school-appropriate, of course! I saved them to my Google Drive, then opened each image in the "Do Ink" app from there.
Then I saved the Do Ink photos to the Google Drive, too, and used a simple photo editor to type the text on each child's image.
Finally, I loaded the images to Animoto, chose a song, and watched it all come together! Animoto has free educator accounts, so the length of video is much longer than the 30 second freebie!
Saturday, June 20, 2015
Sock Puppets
Posted by
jackbennysmom
at
10:47 PM
By Smith Micro Software, Inc.
Sock Puppets lets you create your own puppet shows in seconds, then share them on Facebook and YouTube with just a few taps. Just add puppets, props, scenery, and backgrounds to start creating. Hit the record button and the puppets will automatically lip-synch to your voice.
This app can be used to support conversation skills, sequencing, storytelling, collaborative learning, and self-directed learning. Students work alone or in pairs with the task of creating a video lasting up to 30 seconds.
Classroom Uses:
Students/teachers can create puppet shows to:
- Explain a science concept.
- Retell a story.
- Tell about an event from history.
- Share information about a famous person.
- Model appropriate social behavior.
- Tell jokes. (Knock-knock jokes work well!)
Here's a good tutorial to walk you through it!
Book Creator Lite
Posted by
jackbennysmom
at
8:10 PM
This free version only allows one book in progress, but a paid version is available. The free version is great if you can email or upload the ebook for sharing, then delete.
Illustrate and write mini books or class books, using Book Creator. Animal facts, types of transportation, ocean animals (Look at the _____). Can type or write, or dictate with voice to return later to type. Students can record audio to go with their pages, to make their own audio ebook! Photos and videos may be embedded, as well.
Click to see the ebook in my Dropbox account.

click to see the ebook in my Dropbox account
Because I don't have enough iPads for every student, I usually schedule two days in the lab, and do half on iPads while others are on the web, then switch the next day.
Sometimes I give the students a sentence starter, then they type the rest on their own.
To export the ebook and share with others (or print):
- exit the book so you see all the past creations on the screen
- Select the book you want to share
- export as ePub so others with apple devices can view in iBooks (email it or send to iTunes) OR
- export as a pdf (preferred to share with parents via email, your Google Drive, or Dropbox (without audio)
This video is a quick way to see what Book Creator is all about!
Teachers may enjoy creating a single class book to introduce a unit or concept for your students to read, or students can do group or individual books (fiction or non-fiction writing, create a counting book or alphabet book), and so much more! Just remember that whatever you might normally give to students to do on paper, you might be able to do in Book Creator!
UPDATE: I have since learned that the only way to start a new book is to delete the app and reinstall. Sorry about that! My school has the full version, so I didn't know it was so complicated with the free one.
UPDATE: I have since learned that the only way to start a new book is to delete the app and reinstall. Sorry about that! My school has the full version, so I didn't know it was so complicated with the free one.
Kidspiration Maps Lite
Posted by
jackbennysmom
at
7:56 PM
If you've used Kidspiration in your computer lab, this mobile version is similar, and easy for the kids to use! I love that the scrolling icon library has over 1400 symbols sorted into categories!
Ideas for meeting standards with this app include:
- make an idea web about ocean animals
- show pairs of pictures that rhyme
- list pictures that start with a given letter
- Sort and Classify
- math problems
Be sure to encourage your capable writers to phonetically spell a handful of their words.
Here's another idea from around the web:
Venn Diagram
 |
| http://specialappsspecialkids.blogspot.com/2014/08/review-kidspiration-maps-by-inspiration.html |
The free version does have a limit on how many idea maps can be saved (5), so you'll have to delete the old ones once you've uploaded them to Dropbox or Google, or emailed them to yourself! The paid version is quite pricey, at $9.99.
I couldn't really figure out how to save it or export it, so I just did a screen shot of the whole thing, then emailed it to parents. It could be printed and displayed, too, but remember, this tech thing can be used in place of paper, so why print?
I couldn't really figure out how to save it or export it, so I just did a screen shot of the whole thing, then emailed it to parents. It could be printed and displayed, too, but remember, this tech thing can be used in place of paper, so why print?
ChatterPix Kids
Posted by
jackbennysmom
at
5:58 PM
by Duck Duck Moose
ChatterPix is a FREE iPhone and iPad app that is simple to use but endless in possibilities. The app allows you to take any image, add a "mouth" and then record 30 seconds of audio to allow the image to talk.
In my class, I have used the app to describe animal facts, practice skip counting, retell a story, create a talking alphabet, read a list of sight words, explain classroom rules, and more. The simplicity and creative nature of this app make it a sure hit in your classroom.
Here is an example of my kids just playing with the app at playtime. Adding text, filters, and stickers makes it extra fun! They like to take photos of Mr. Potato Head and make him talk, or my coffee cup, or each other. I often find funny ChatterPix videos in the gallery, such as someone's T-shirt or backpack with Elsa, talking about their day. Sometimes I find a photo of a cover of a book, with the character telling a story. Kids are clever and very independent with this app! We have a lot of experts who help others.
Use the Drawing Pad or Doodle Buddy and the ChatterPix Kids apps to create talking snowmen. The snowmen tell you what they think about the weather we have been having!
1. Draw in the drawing app
2. Save in the camera roll
3. Import the photo into ChatterPix
4. Make it talk!
I thought this was a cute idea - students help a book character come up with a New Year's resolution! Or students could retell the story, make up a new ending for a story, etc.
Here's a great article for teachers on how to use ChatterPix to encourage creativity!
Matt Gomez does a terrific job explaining the app step by step.

For more ideas, you can check out this Pinterest board I found!
Pic Collage
Posted by
jackbennysmom
at
5:38 PM
Pic Collage By Cardinal
by Cardinal Blue
As the company description outlines, PicCollage lets you instantly arrange your photos into frames - or get creative with freeform collages, cutouts, filters, borders, stickers, and text. It's like photoshop with your fingers! That being said, I felt inspired to share some of how we've been using PicCollage on my blog with hopes to inspire others.
Steps for an easy project:
- Choose a background
- Take a Selfie!
- Take pictures of three things they like about Kindergarten (or things that start with ___, or things that are green/round/cold, etc)
- Type their name
- Export the finished product to the camera roll
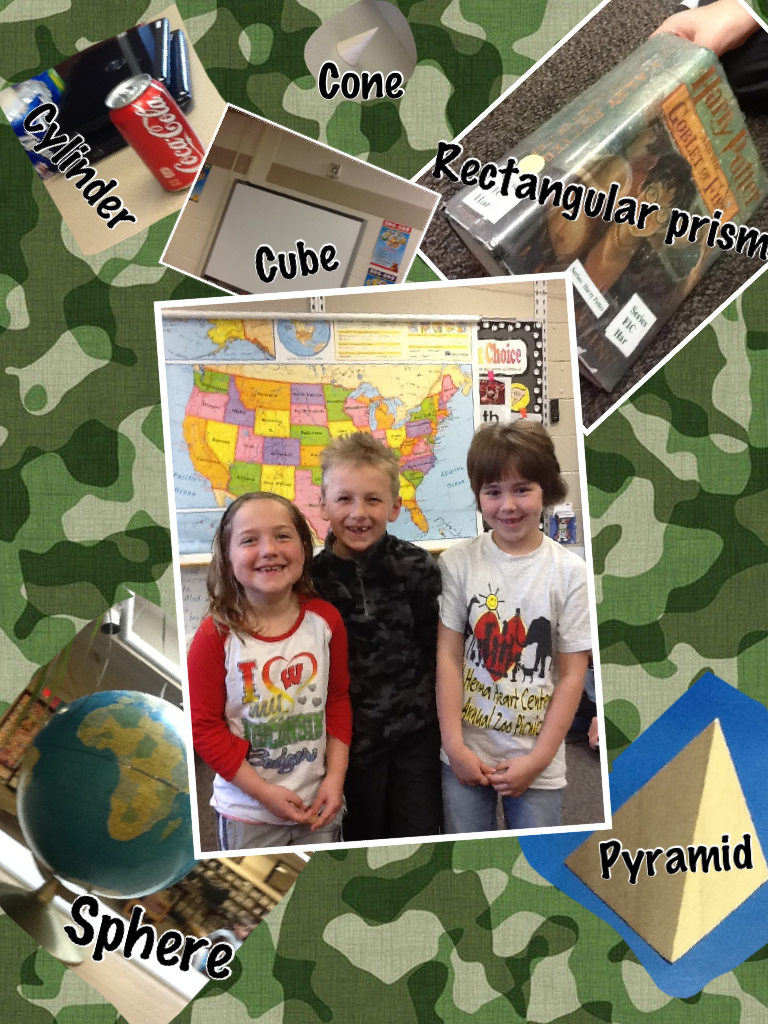
Use PicCollage for taking pictures on a 3D shape hunt or words that start with a certain letter
Use PicCollage to make a message for Mother’s Day, add a photo of the child or take a photo of a drawing the child made. (I love you because _____. You’re the best mom because _____.)
From around the web:
Ways to Make a Number
http://tech38.blogspot.com/2013/11/using-app-pic-collage-in-primary.html
Objects in the sky
 |
| https://twitter.com/tickled2teach/status/395313670772625408/photo/1 |
Color Collages
http://blogs.southfieldchristian.org/elemapptitude/using-ipads-for-color-photography-with-piccollage/
Don't forget to load them all to Dropbox or Google Drive and share with families, or email individual projects to parents!
Doodle Buddy
Posted by
jackbennysmom
at
5:02 PM
by Pinger, Inc.
In general, this app can be used for journal activities, draw/write response, label parts of ______ (plants, 5 senses, etc). math problems, clip art for beginning sounds, and so much more!
Use the tic tac toe background for nice boxes to practice beginning sounds, sightwords, ways to make a number, or word families
Use the stickers to practice counting or addition/subtraction
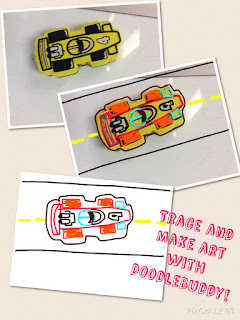
Take a photo and trace it with the tools, then change the background to white!
See another art idea here: https://blogs.ksbe.edu/elcordei/2013/06/05/doodle-buddy-fun/
Take a photo or screenshot of a hundreds chart, and use stamps to touch and count/skip count
Take a photo or screenshot of any worksheet for matching letters or rhymes/handwriting/math. Students can access your worksheet in the camera roll, or take a photo of it themselves!
Use as a whiteboard activity (short e lesson)
To erase the ink and stamps: SHAKE IT! Or choose the eraser in the chalk tool menu (enlarge it if needed). To erase the background, choose a white background.
To save or send: Click the wrench, save to camera roll or send as email (have your email set up)
"App Smashing" project idea:
- Draw on doodle buddy, save in camera roll
- import into a talking app such as ShowMe or ChatterPix to tell about their picture or a story.
- In my class, students took a turn with the iPads, and learned how to save it.
- Then I worked with students during centers to do their recording in ChatterPix.
Subscribe to:
Posts (Atom)


